
Getting Started
How to Withdraw from Binance: Network, Memo, Fees and Test Sends
A practical Binance withdrawal checklist: match networks, handle Memo/Tag, read live fees, verify with TXID, and avoid wrong-chain USDT mistakes.
How to Withdraw Crypto from Binance: Network, Memo, and Fee Checklist
A Binance crypto withdrawal moves funds from your exchange balance to an external address you control—another exchange deposit page, a self-custody wallet, or cold storage. Once the transaction is broadcast on-chain, it is usually final. That is why withdrawals need a stricter checklist than a simple spot buy.
Verified against public Binance fee and academy materials in July 2026. Supported networks, minimum amounts, and withdrawal fees change; always trust the live values on your Withdraw screen, not screenshots from an old article.
What must be true before you click Withdraw
Think in three checks, not one:
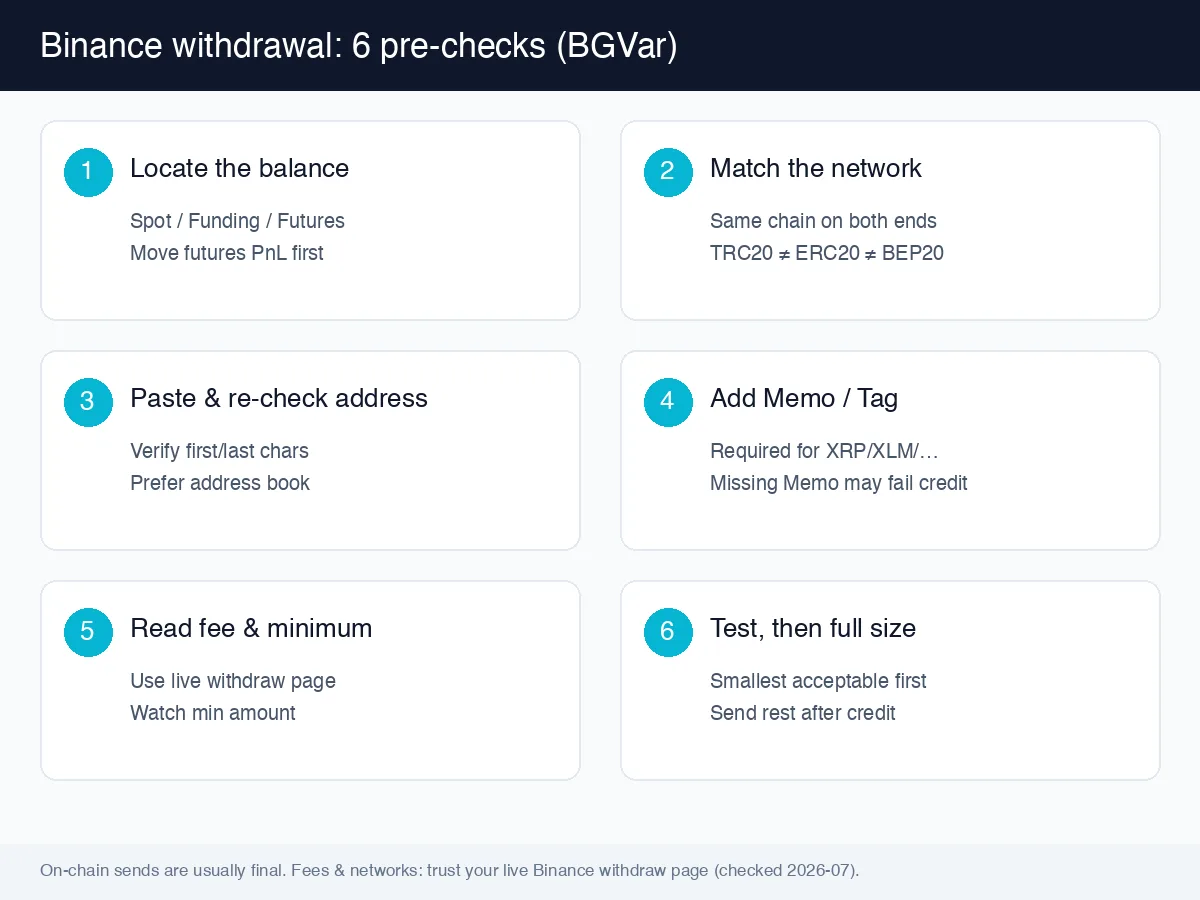
- Balance location — Spot, Funding, and Futures balances are separate. Futures PnL usually needs an internal transfer into Spot/Funding before a chain withdrawal. Internal transfers stay inside Binance and do not pay a blockchain network fee.
- Network match — “USDT” exists on several chains (TRC20, ERC20, BEP20, and others). Same ticker ≠ same network.
- Memo / Tag requirements — For assets such as XRP, XLM, EOS, or ATOM, a correct address with a missing Memo can still fail to credit on the receiving platform.
If withdrawal limits look unusually low, finish identity verification first: Binance KYC guide.
Step-by-step withdrawal flow
- Open the official Binance app or website (saved domain / official store only).
- Go to Wallet → Withdraw and choose crypto / on-chain withdrawal.
- Select the asset (USDT, BTC, ETH, …).
- Choose the exact network the receiving address uses.
- Paste the address. If the form asks for Memo, Tag, or Remark, fill it exactly as the receiver provided.
- Enter the amount and read network fee and amount received.
- Complete security prompts (email, SMS, authenticator).
- Open withdrawal history and save the TXID after it appears.
For a brand-new address:
- Save it in the address book and re-check the first/last characters.
- Send a smallest acceptable test amount first.
- Only send the rest after the test credits.
Choosing a USDT network: TRC20 vs ERC20 vs BEP20
Tether (USDT) is issued across multiple protocols and chains. Public encyclopedic summaries of Tether emphasize that multi-network issuance—this is why the withdrawal form forces you to pick a network instead of “just USDT.”
| Network (common label) | Often used for | Cost / speed (relative) | Main failure mode |
|---|---|---|---|
| TRC20 (Tron) | Exchange-to-exchange, small frequent moves | Often cheaper and faster in normal conditions | Receiver does not support TRC20 |
| ERC20 (Ethereum) | Ethereum wallets and DeFi | Often much more expensive | Congestion spikes gas cost |
| BEP20 (BNB Smart Chain) | BSC ecosystem wallets | Usually cheaper than ERC20 | 0x addresses look like Ethereum; wrong-chain sends |
Decision rules that actually reduce mistakes:
- The network is valid only if both sides support it.
- Moving between two CEXs that both list TRC20 USDT → start by comparing the TRC20 fee on the withdraw page.
- Depositing into an Ethereum-only wallet or DApp → ERC20 is usually mandatory.
- Never assume
0x…means ERC20. BEP20 addresses frequently share the same prefix style.
Withdrawal fees are platform-set packages that cover network costs and may change. Check Binance deposit/withdrawal fees, our fee overview page, and how to lower Binance trading fees for trading-side cost context. For product flow language, see Binance Academy’s deposit & withdrawal guide.
When Memo / Tag is non-negotiable
| Signal | What to do |
|---|---|
| Withdraw form marks Memo/Tag required | Paste the full string from the receiver—no spaces added or removed |
| Receiver says “no Memo needed” | Follow that instruction; if unclear, test small or pick a clearer deposit option |
| You copied only the address | Credit may fail; recovery depends on the receiving platform and is not guaranteed |
Treat Memo as a room number: the building address can be perfect and the package still never arrives if the room is wrong.
Fees, limits, and “how long will it take?”
- Network fee: Shown on the confirmation page; sometimes deducted from the send amount.
- Minimum withdrawal: Below the threshold, the form will not submit.
- Arrival time: Binance processing + on-chain confirmations. Congestion stretches both.
- UID / internal send: Sending to another Binance user can use an internal path with different rules—do not assume it is free or instant without reading the screen.
If status stays on processing longer than you expect:
- Open history and check whether a TXID exists.
- TXID present → query the correct block explorer and share the hash with the receiver.
- No TXID → the request may still be in review or queue; avoid spamming identical withdrawals.
- Contact support only through in-app/official site channels—never through chat app “agents.”
After you withdraw: verify with TXID
- Copy the TXID from withdrawal history.
- Open the explorer for the same network you selected (wrong explorer = empty or misleading result).
- Confirm success/confirmations, destination address, and amount.
If the explorer shows success but the receiving account does not, send them the TXID. Do not “fix” a second full transfer.
Stop immediately if you see these patterns
- Someone DMs you as “Binance support” with a deposit address.
- You are told to send coins to a “verification wallet” to unlock funds.
- Pressure to disable 2FA, export a seed phrase, or allow remote control.
- A random contract address that will “activate your limit.”
- A large first send to a freshly pasted address without a character check.
BGVar is an independent tutorial site, not Binance. See our disclaimer for risk language.
Practical scenarios
| Goal | Safer approach |
|---|---|
| CEX → another CEX | Generate the deposit address on the destination first, mirror coin + network on Binance, test small |
| CEX → hardware wallet | Verify firmware/address path; split large amounts; receive a tiny self-test first |
| CEX → DeFi on Ethereum | Confirm chain + token contract; re-price ERC20 fees when the network is busy |
| Stay inside Binance only | Prefer internal wallet transfer; skip on-chain withdrawal |
Funding the account in the opposite direction is covered in How to fund Binance. If an inbound deposit is slow, check TXID, network, and confirmation count before sending again.
30-second pre-submit checklist
- Correct asset
- Network matches the receiver
- Address prefix/suffix re-checked
- Memo/Tag filled when required
- Fee and receive amount reviewed
- Test send done for new addresses
- No address came from a private-chat “support” agent
⚠️ On-chain withdrawals are typically irreversible. Wrong network or Memo mistakes can mean permanent loss. This page is an operational checklist, not investment advice, and no third party can promise recovery.